
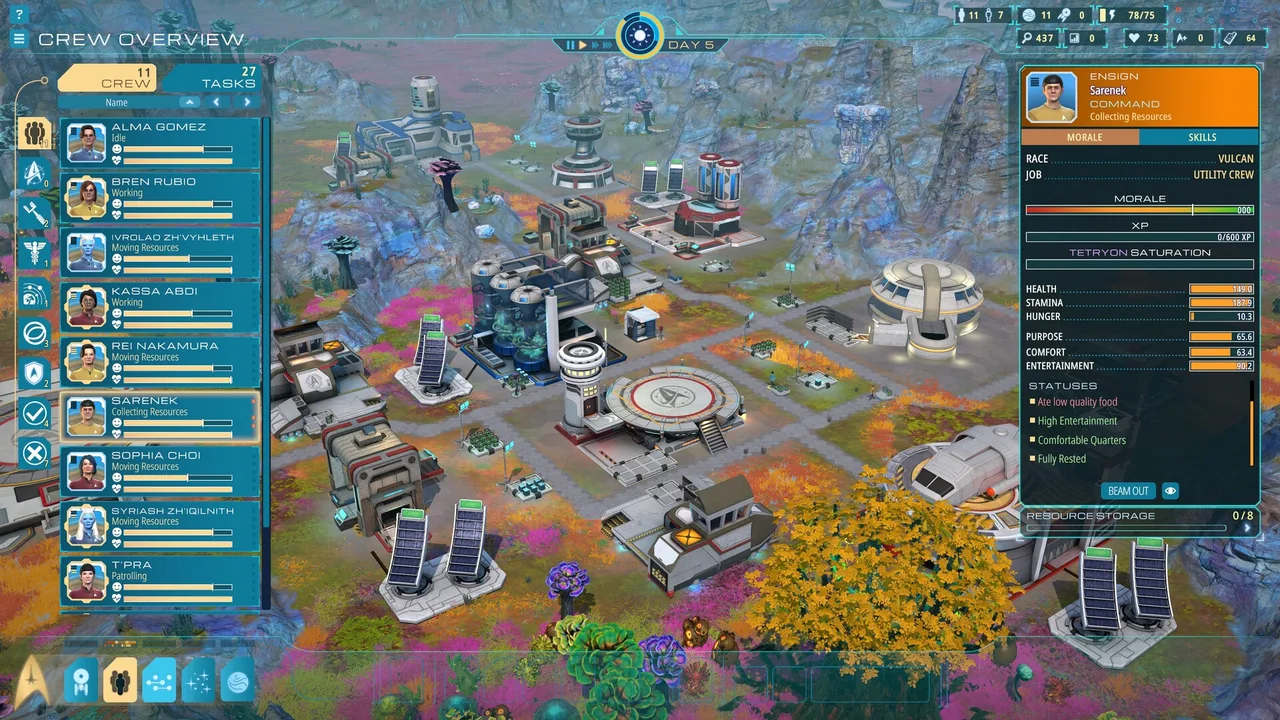
Official Steam screenshot · Magic Fuel Games / Playstack · TM & © 2026 CBS Studios Inc. Material statement.
Start with the requirements a layout must satisfy
The official logistics description says pipes and conduits occupy physical space. The post-demo developer material also discusses protected expansion and local facilities supporting the crew. Those are meaningful planning constraints because a settlement needs more than enough room to place its visible structures.
They do not establish a single ideal arrangement. No source in this research compares different blueprints through controlled throughput, safety, or travel measurements. A layout-principles guide can therefore explain what a plan needs to accommodate without pretending that a particular diagram has already won such a comparison.
Treat utility space as part of construction
A utility network cannot be ignored when the developer explicitly describes its physical footprint. This supports considering infrastructure access while placing facilities rather than treating it as a completely separate problem. The practical question is how the planned structures will receive the support the documented systems require.
The research does not supply a mandatory corridor width, pipe-spacing formula, or universal grid size. Adding those numbers would make an illustrative arrangement look more authoritative than the evidence allows. Keep the planning principle qualitative until the actual map, build, and utility requirements provide the measurements needed for a precise recommendation.
Protected space is a constraint, not a complete blueprint
The GameGrin demo preview describes the limits of the protected area encountered during that session. The later official material announces shielded expansion, giving the earlier observation additional version context. Together, the sources explain why protection belongs in layout planning without proving a final protection radius.
A compact arrangement is not automatically the best one simply because protected space is limited in a particular demonstration. The available evidence does not compare its material flow, staffing demands, or later expansion against alternatives. Use protection as one criterion among the documented requirements rather than turning it into an unsupported rule that all structures must follow one fixed pattern.
Account for movement and resource access
The researched hands-on material identifies several connected infrastructure systems rather than offering one prescribed base plan. The practical layout question is whether the intended work can be supplied and supported across those relationships. A visually tidy arrangement alone does not establish that it performs better under the same operating conditions.
RonEmpire's transcript around 01:19:36–01:20:27 provides a historical placement lesson, not a benchmarked design. It illustrates why a connection or placement decision can matter in a session. It cannot be stretched into proof of an ideal transport distance, a perfect production block, or a map-independent best layout.
Include the facilities that support the crew
Local crew facilities appear in the post-demo developer material as part of the outpost's supporting systems. That makes crew support relevant to the layout question rather than only to a separate personnel page. A plan should be considered in relation to the work and support it is intended to accommodate.
The source material does not establish the best final arrangement of those facilities. It would therefore be misleading to attach exact service ranges, occupancy rules, or staffing ratios to a diagram without separate verification. The useful takeaway is to include the documented support needs in the evaluation instead of assessing a settlement only by its production structures.
Read early footage as a dated example
The two inspected demo recordings predate the June 12 update. Retro-Badger's passage around 12:57–15:08 links the Operations Center with protection in that early build. The recording supports the historical relationship, but it is not a comparison of all later expansion choices.
This matters whenever a guide presents a screenshot as if it proves an optimal final arrangement. A single session can demonstrate a workable decision without demonstrating the best possible one. Retain the build context and the actual observation, rather than claiming the picture settles every later map or utility configuration.
What a genuine “best layout” comparison would require
A useful comparison would evaluate alternatives on the same map and game build. The relevant criteria suggested by the documented constraints include resource flow, movement demands, support coverage, and hazards. That is a proposed method for testing layouts, not a claim that this wiki has already completed those measurements.
Keeping the test conditions consistent matters because a layout's apparent advantage may depend on circumstances outside the diagram. The collected material does not supply the data needed to rank all alternatives fairly. Until that evidence exists, a principles-based page is more reliable than assigning an unsupported winner and calling it universally optimal.
Is a workable example evidence of the best design?
A workable arrangement shows that a particular session used that arrangement. It does not establish that every alternative performs worse, especially when the sources do not compare them under the same conditions. The distinction matters because a screenshot can look persuasive even when it supplies no measurement of the claimed advantage.
For this keyword, the useful evidence concerns the constraints a plan must handle. Utility space, support, movement, and protection give the discussion substance without requiring an invented winner. A diagram should help a player understand those relationships rather than use visual polish as a substitute for a tested comparison.
Apply the same reading when looking at an early demo base. Keep its map and build context attached to the observation, and avoid treating an apparent spacing choice as a universal dimension. The current research supports evaluating layouts through documented requirements, while a genuine best-layout claim still needs evidence comparing the actual alternatives.
Use a layout plan as a decision tool
The purpose of a plan is to make the documented dependencies easier to see before an expansion creates more work. Ask how the utilities reach the intended facilities, what movement the arrangement requires, and where local support and protection fit. Those questions are supported by the collected systems material without requiring invented numerical rules.
The direct answer remains that there is no verified universal best blueprint in this research. The building, power, resource, and crew guides explain the individual constraints in more detail. Bring those relationships together for the map and version you are actually using, rather than mistaking an illustrative arrangement for a tested optimum.
Sources and update context
This page uses the official information collected for the October 18, 2026 research pass. Pre-release descriptions may change. Refer to the current storefront and developer announcements for availability and launch details.
- Captain’s Devlog #3 — Resources, Logistics, and Star Trek 60th
- Captain’s Devlog #1
- But Why Tho? — Star Trek: Outposts Unknown Is A Star Trek Colony-Sim In Every Way
- GameGrin — Star Trek: Outposts Unknown Preview
- RonEmpire — Full Gameplay, Steam Next Fest demo
- Retro-Badger-Gaming — Demo Playthrough with Commentary